Unit 86 - Mask making in the performing arts
Thursday, 10 April 2014
Mask Research
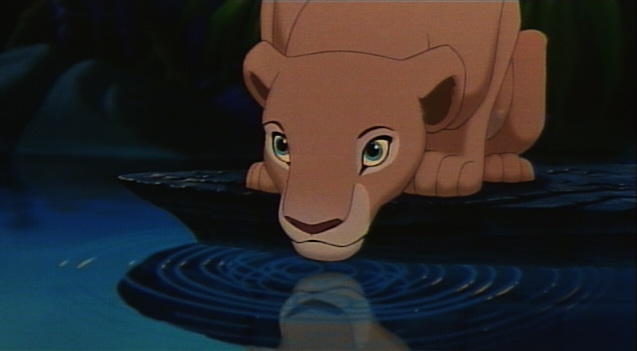
I am going to be constructing the mask for Nala, a lioness for the production the Lion King.

Nala is Simba's best friend and they are always together as cubs. Unknown to them, they are betrothed at an early age. She is playful, energetic and full of life. She is cream in colour and has blue / grey eyes.


In the Musical Nala has a headdress. It is made of carbon graphite, a lightweight but durable material cast from a silicone mold, paint and polyester fibers. She also has facepaints.
In reality, lionesses are more sandy brown in colour, with round ears and a black nose. I will bare this in mind when I come to making the mask.
Wednesday, 9 April 2014
Design Methods
This mask does not need to cover the user's face, it is more of a headband. I will start with a normal had band and develop it using techniques such as sowing. It will be a simple design because it does not need to be too detailed or complicated. However I want to make it look unique as well.
 Sowing is an important part of making my mask. I will need to sow the ears to the headband and the inner section of the ears to the ears themselves too. It is the best and only way to do this because it will make sure the ears are securely fitted and will not fall off. Because this is being made for a child, it will need to be tightly made and reasonably strong because they child would be tempted to pull and mess with it. To make it less likely to break or fall apart I will sow as much as I need to. I cannot use a glue gun because the material will not stick, so it will be ineffective.
Finally I need to make sure the headband is comfortable and that the child wearing it will not suffer any injuries. This is unlikely with mine because I will not be using sharp objects such as wire or anything of the sort. Instead I will ensure it is comfortable by covering all areas with the soft material I plan on making the head with.

For my other mask, there are different methods that I will need to use, such as paper mache, plastering and painting. These will all be important for making my mask strong and making it look good in the end. Paper mache is the first technique. I need to put several layers on to increase the strength of the mask, giving it more support for when I go to plaster over it. I will use a paintbrush with the PVA glue and water to evenly spread the glue across the mask. Using a paintbrush means it is less likely for the balloon to pop because it is light and I will be less likely to put pressure on it.
After the paper had dried, I peel off the mask from the balloon and begin to plaster. This will give my mask the shape and thickness that I need it to be for the final stage. I can apply as much as I want to in order to make it tough. The stronger it is the less likely it is for cracks to form. I will spread the plaster across the mask in small sections, in one direction to ensure all parts are covered and so that it is even. Using a paintbrush would not be effective here because the plaster is too thick. I have to use my hands. I cannot use mod rock or any other type of plaster because I only need a small amount and it needs to be a reasonably thick coat.
Another method is using sand paper. This will give the mask a smooth finish. After that I can use a stanley knife to cut out the shape I want. I need to use a stanley knife over anything else because they are easy and small enough to cut with in relation to the size of the section I need to shape. All other sharp tools will not work as well. When this is done I can start to decorate it using paints. I will use a paintbrush and slowly cover the mask with a few coats to make the mask more durable and to completely cover the mask and darken the colour if I need to.
 Sowing is an important part of making my mask. I will need to sow the ears to the headband and the inner section of the ears to the ears themselves too. It is the best and only way to do this because it will make sure the ears are securely fitted and will not fall off. Because this is being made for a child, it will need to be tightly made and reasonably strong because they child would be tempted to pull and mess with it. To make it less likely to break or fall apart I will sow as much as I need to. I cannot use a glue gun because the material will not stick, so it will be ineffective.
Finally I need to make sure the headband is comfortable and that the child wearing it will not suffer any injuries. This is unlikely with mine because I will not be using sharp objects such as wire or anything of the sort. Instead I will ensure it is comfortable by covering all areas with the soft material I plan on making the head with.

For my other mask, there are different methods that I will need to use, such as paper mache, plastering and painting. These will all be important for making my mask strong and making it look good in the end. Paper mache is the first technique. I need to put several layers on to increase the strength of the mask, giving it more support for when I go to plaster over it. I will use a paintbrush with the PVA glue and water to evenly spread the glue across the mask. Using a paintbrush means it is less likely for the balloon to pop because it is light and I will be less likely to put pressure on it.
After the paper had dried, I peel off the mask from the balloon and begin to plaster. This will give my mask the shape and thickness that I need it to be for the final stage. I can apply as much as I want to in order to make it tough. The stronger it is the less likely it is for cracks to form. I will spread the plaster across the mask in small sections, in one direction to ensure all parts are covered and so that it is even. Using a paintbrush would not be effective here because the plaster is too thick. I have to use my hands. I cannot use mod rock or any other type of plaster because I only need a small amount and it needs to be a reasonably thick coat.
Another method is using sand paper. This will give the mask a smooth finish. After that I can use a stanley knife to cut out the shape I want. I need to use a stanley knife over anything else because they are easy and small enough to cut with in relation to the size of the section I need to shape. All other sharp tools will not work as well. When this is done I can start to decorate it using paints. I will use a paintbrush and slowly cover the mask with a few coats to make the mask more durable and to completely cover the mask and darken the colour if I need to.
Step by Step Guides
Lion King Mask


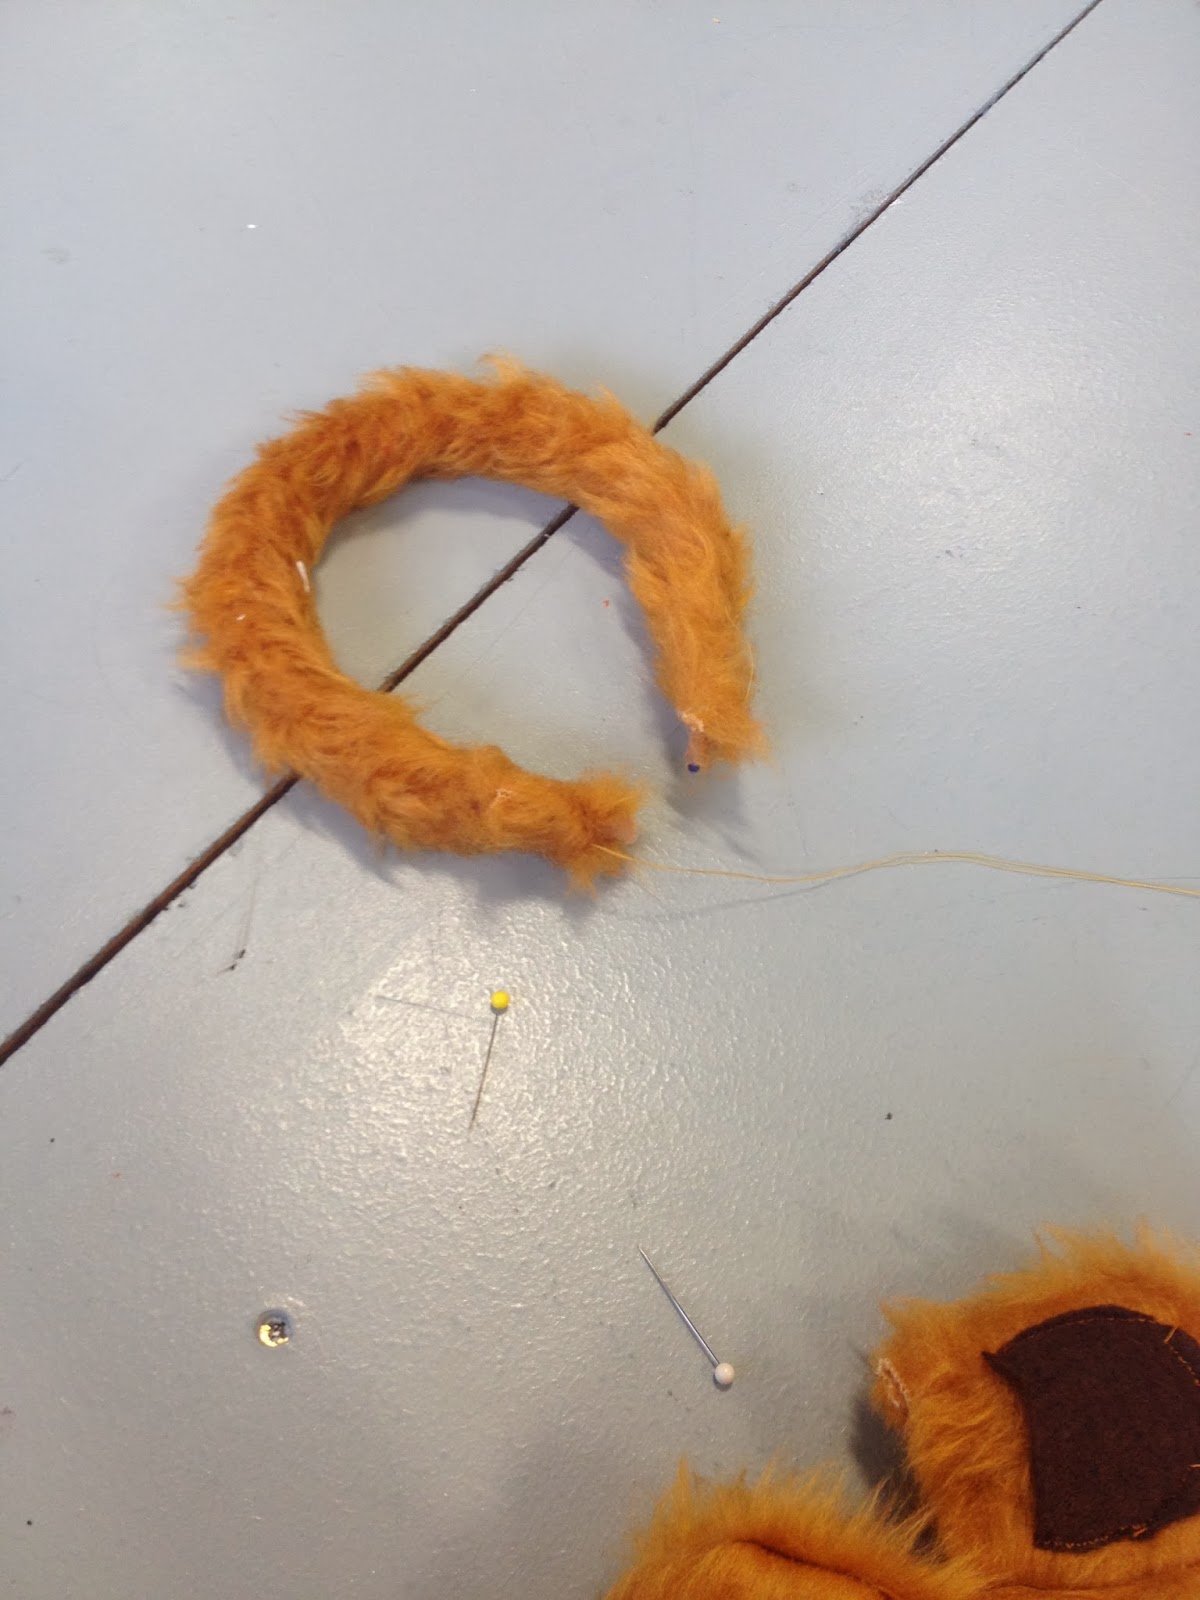
1. Wrap the material around the mask securing it with a needle and thread matching the colour of the fur if possible. You may need to sow through the material to make it secure.
2. next make the ears. This is done by folding a thick strip of the material used around the headband in half and securing that my sowing around the outside.
3.Then stuff the inside of the ear with fluff until it looks like the picture above.
4. Then secure the bottom by sowing the 2 sides together.
5. To make them look more like ears cut out an oval shaped piece of dark brown felt and stitch it to the centre of the ear so it resembles an ear.
6. Attach the ears to the headband making sure they are equally apart. Stitch them to the band from the bottom corners of the ears right throught the material on the band so that they are secure. A similar coloured thread will ensure that it is not noticable. Use as much thread as required.
7. To make the headband look more like the character, cut out a thin strip of pink felt and attach it to the centre of the band tying it into a bow.
Venetian Mask
1. Start by finding a picture on the internet of the shape of the mask you want to make. Cut it out and blow up a balloon, placing the cut out on it.
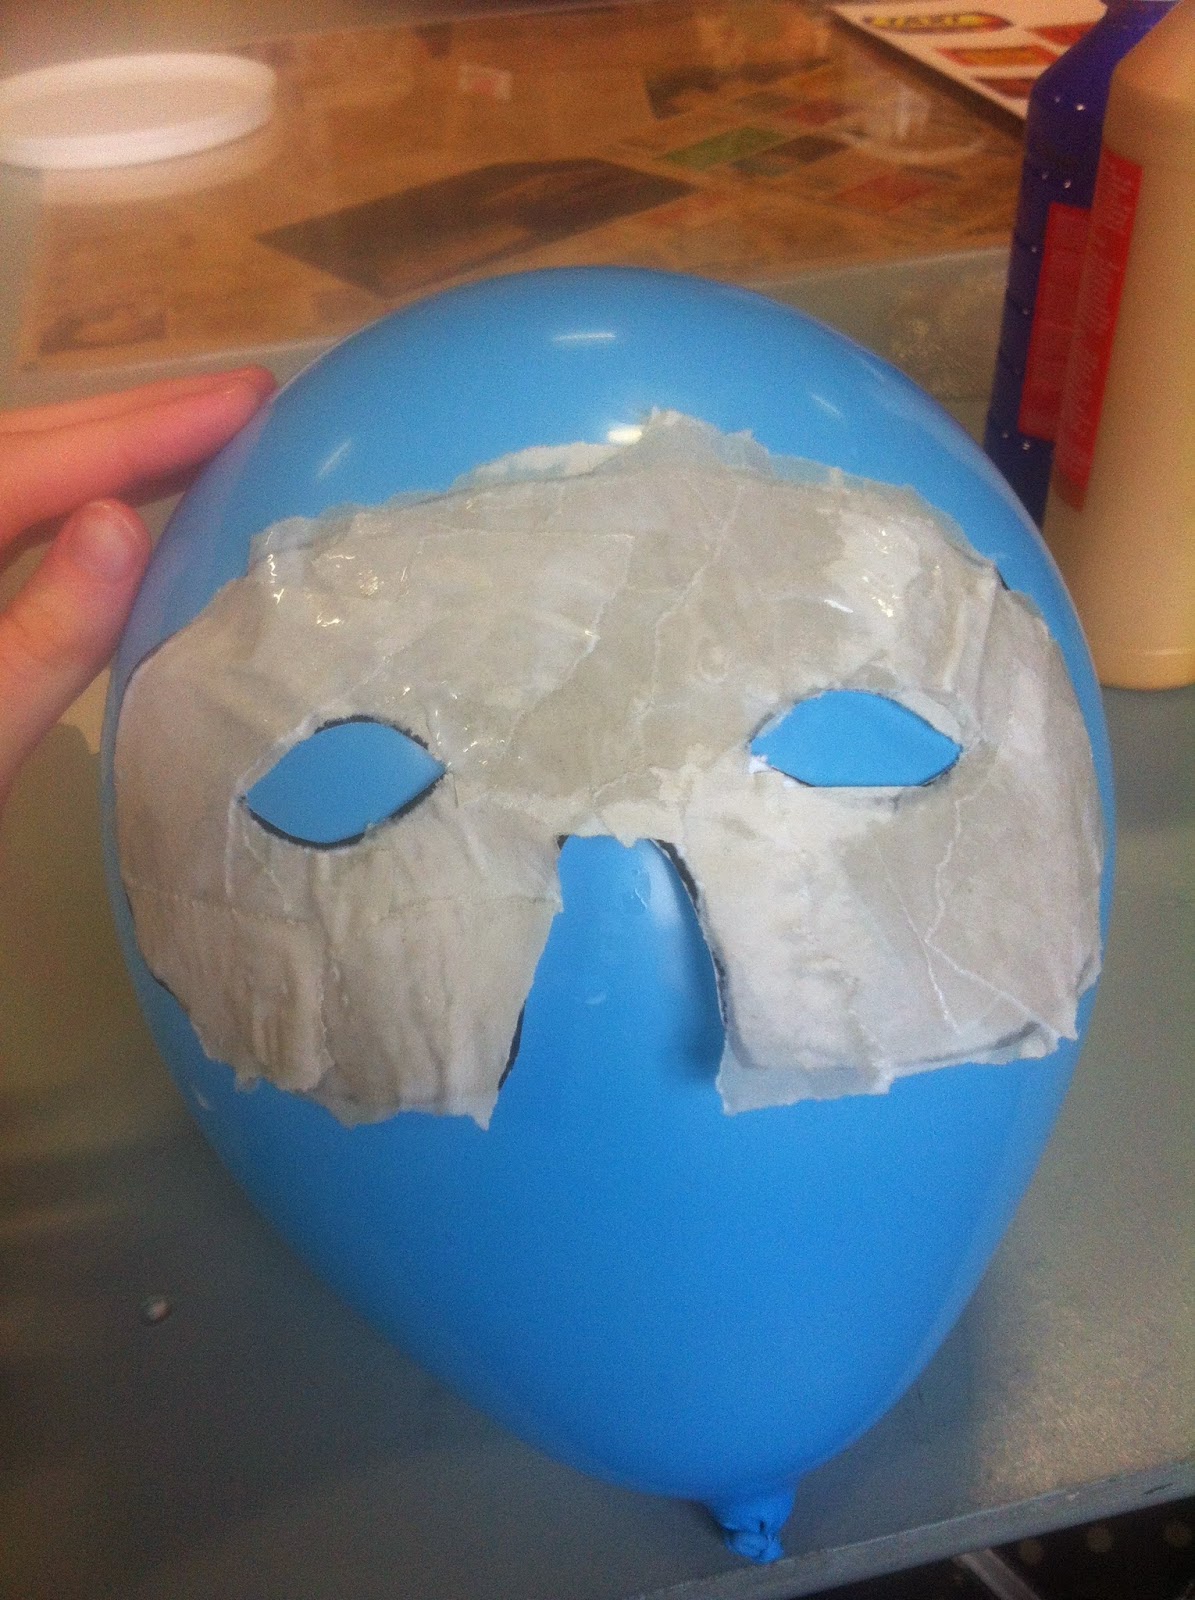
2. The next step is to start doing paper mache. Rip up small pieces of newspaper and make a collage over the mask using the glue to stick it and hold it down. When you have applied 8 - 10 layers leave it to dry.
3. When it has dried, peel it off the balloon gently and begin to plaster. Smoothly and gently spread it across the mask making sure you cover everywhere. A few layers of this might be needed depending on how thick and how strong is it already. Leave to dry for an hour or 2.
4. Use sandpaper to sand down the mask so that it is smooth and any uneven patches are evened out. This will make it easier to decorate and it will look more professional.
5. Using a sharp object e.g.a scalpel, carve the pattern you want into the mask. Do not cut too deeply because it may break the mold.

6. Paint the mask in the style you wish to replicate. You may need more than one coat depending on how dark you want it to be. Leave to dry.
Final Constructed Masks
I painted the carvings a darker red colour to highlight the carvings a bit better. In the end, this is what it looked like.
Below is a picture of my completed Lion King headband.
Tuesday, 8 April 2014
Evaluation
During the process of the Mask making unit we first had to start off by doing 'mask historical context research, which was the research of how masks came about being used through out the years such as Greek theatre masks (which were made to throw the voices of the speakers), Middle ages, etc. We had to produce similar research for the Lion King masks, this research would include the characters individual facial features, colours used as well as researching the masks that have been made for the actual production of The Lion King Musical.
The design methods that I used were simple but effect, for the Lion King, the 'mask' had to be suitable for a primary school child to wear so it couldn't be too top heavy. We were also asked to ensure that the 'mask' didn't cover the face of the child, this could have been considered dangerous thus making it unusable. I took a simple Alice band and wrapped material around it so it was a suitable colour should any parts of the band be shown making it less obvious. after that, I took a separate piece of material (fur) and wrapped it around the head band also ensuring it was securely sewn to the band. The making of the ears was very straight forward.
In conclusion I think my Lion King mask turned out to look what I originally planned on it doing so. this including the textures, materials and the ears all went smoothly as planned.
For the venetian mask, The methods involved in creating this were also basic. The simple use of a balloon and papier mache to create the correct shape and giving it enough strength to hold its shape to be able to start mod rocking. There were minor problems that occurred such as the first balloon used burst before the papier mache had dried. other than this the whole making worked smoothly. Another problem that occurred was the original idea of creating a witch doctor mask caused part of my mask to break. resulting in me having to completely change the design of my mask. I easily found a new design that I liked and follow that through.
The end product I believe was effective yet still very simple even though I had moved away from the original 'venetian masquerade mask'.
Subscribe to:
Comments (Atom)


